This article is part 1 of a series that will explain how to build a crypto triangle arbitrage dashboard using Rust and React. In this part 1, we will build the backend for the triangle arbitrage dashboard. The backend will gather data about trades for 3 coin pairs from the Binance WebSocket API. Then, it will calculate potential profits if we were to trade the pairs in sequence.
Triangle arbitrage attempts to take advantage of price discrepancies between 3 assets that form a triangle on the same exchange. An example trade would be: BTC -> ETH -> BNB -> BTC.
Our dashboard will show possible crypto triangle arbitrage opportunities on the Binance cryptocurrency exchange. This article builds on skills we learned previous articles:
- Easily connect to Binance WebSocket streams with Rust
- Rust Warp WebSocket server: learn how to now
- Warp data update loop: easy how to
Find the completed code project for this article on my GitHub, here.
Part 2 where the frontend is implemented is here.
Prerequisites
Some knowledge of the Rust programming language is required.
I recommend reading the previous articles listed above before starting this article. We will use code produced in those articles, and essentially combine them into one. However, we will briefly go over the previously developed codebases, but we won’t go into detail here.
For more detail, please refer to the articles in the introduction to this article.
Reviewing the previous code bases
We will start with refreshing our memories by reviewing the code from two of the three articles, before we work on the crypto triangle arbitrage dashboard backend. Because the code produced in the “Warp data update loop: easy how to” is a more complete version of the article that preceded it, we will only look at that one. The code can be found in the following GitHub repositories:
- https://github.com/tmsdev82/binance-websocket-tutorial
- https://github.com/tmsdev82/warp-update-loop-tutorial
We will use the code from the “warp-update-loop-tutorial” as a base. We will go through all the main parts that make up these codebases to get a basic understanding of the foundation. For more in-depth information please see the previously listed articles.
Warp WebSocket server code base: main.rs
The main.rs file contains the setup and run-code for our warp webserver. Here is the full code listing:
use std::{collections::HashMap, convert::Infallible, sync::Arc};
use tokio::sync::{mpsc, Mutex};
use warp::{ws::Message, Filter, Rejection};

mod handlers;
mod workers;
mod ws;

#[derive(Debug, Clone)]
pub struct Client {
    pub client_id: String,
    pub sender: Option<mpsc::UnboundedSender<std::result::Result<Message, warp::Error>>>,
}

type Clients = Arc<Mutex<HashMap<String, Client>>>;
type Result<T> = std::result::Result<T, Rejection>;

#[tokio::main]
async fn main() {
    let clients: Clients = Arc::new(Mutex::new(HashMap::new()));

    println!("Configuring websocket route");
    let ws_route = warp::path("ws")
        .and(warp::ws())
        .and(with_clients(clients.clone()))
        .and_then(handlers::ws_handler);

    let routes = ws_route.with(warp::cors().allow_any_origin());

    println!("Starting update loop");
    tokio::task::spawn(async move {
        workers::main_worker(clients.clone()).await;
    });
    println!("Starting server");
    warp::serve(routes).run(([127, 0, 0, 1], 8000)).await;
}

fn with_clients(clients: Clients) -> impl Filter<Extract = (Clients,), Error = Infallible> + Clone {
    warp::any().map(move || clients.clone())
}
Let’s look at the main parts together, one by one:
#[derive(Debug, Clone)]
pub struct Client {
    pub client_id: String,
    pub sender: Option<mpsc::UnboundedSender<std::result::Result<Message, warp::Error>>>,
}

type Clients = Arc<Mutex<HashMap<String, Client>>>;
The Client struct represents information about a connected client. The client_id field is a randomly generated uuid string. The sender field allows us to send data to the client.
The alias type Clients represents a thread safe, reference tracked, hashmap that keeps track of the connected clients.
async fn main() {
    let clients: Clients = Arc::new(Mutex::new(HashMap::new()));

    println!("Configuring websocket route");
    let ws_route = warp::path("ws")
        .and(warp::ws())
        .and(with_clients(clients.clone()))
        .and_then(handlers::ws_handler);

    let routes = ws_route.with(warp::cors().allow_any_origin());

    println!("Starting update loop");
    tokio::task::spawn(async move {
        workers::main_worker(clients.clone()).await;
    });
    println!("Starting server");
    warp::serve(routes).run(([127, 0, 0, 1], 8000)).await;
}
Here we configure the WebSocket route on lines 23-26. We pass a clone of the clients hashmap, to use in the ws_handler function. In this case, cloning creates a reference to the original clients. Then, we configure CORS on all routes (we only have one, for now) on line 28.
Using spawn we create a new task in a separate green thread on lines 31-33. We pass the list of connected clients to the main_worker function. This function contains the data update loop that sends data to all the connected clients in the list.
Finally, we run the server on IP 127.0.0.1 listening on port 8000, on line 35.
Warp WebSocket server code base: handlers.rs
We see the handler code is used in the WebSocket route to process the connection request:
use crate::{ws, Clients, Result};
use warp::Reply;

pub async fn ws_handler(ws: warp::ws::Ws, clients: Clients) -> Result<impl Reply> {
    println!("ws_handler");

    Ok(ws.on_upgrade(move |socket| ws::client_connection(socket, clients)))
}
In this case, code to upgrade the connection to a WebSocket connection is initiated and a function is called to do further handling of the WebSocket connection: ws::client_connection.
Warp WebSocket server code base: ws.rs
This file holds the logic for handling the WebSocket connection and for handling messages from the client. See the full code listing below:
use crate::{Client, Clients};
use futures::{FutureExt, StreamExt};
use tokio::sync::mpsc;
use tokio_stream::wrappers::UnboundedReceiverStream;
use uuid::Uuid;
use warp::ws::{Message, WebSocket};

pub async fn client_connection(ws: WebSocket, clients: Clients) {
    println!("establishing client connection... {:?}", ws);

    let (client_ws_sender, mut client_ws_rcv) = ws.split();
    let (client_sender, client_rcv) = mpsc::unbounded_channel();

    let client_rcv = UnboundedReceiverStream::new(client_rcv);

    tokio::task::spawn(client_rcv.forward(client_ws_sender).map(|result| {
        if let Err(e) = result {
            println!("error sending websocket msg: {}", e);
        }
    }));

    let uuid = Uuid::new_v4().to_simple().to_string();

    let new_client = Client {
        client_id: uuid.clone(),
        sender: Some(client_sender),
    };

    clients.lock().await.insert(uuid.clone(), new_client);

    while let Some(result) = client_ws_rcv.next().await {
        let msg = match result {
            Ok(msg) => msg,
            Err(e) => {
                println!("error receiving message for id {}): {}", uuid.clone(), e);
                break;
            }
        };
        client_msg(&uuid, msg, &clients).await;
    }

    clients.lock().await.remove(&uuid);
    println!("{} disconnected", uuid);
}

async fn client_msg(client_id: &str, msg: Message, clients: &Clients) {
    println!("received message from {}: {:?}", client_id, msg);

    let message = match msg.to_str() {
        Ok(v) => v,
        Err(_) => return,
    };

    if message == "ping" || message == "ping\n" {
        let locked = clients.lock().await;
        match locked.get(client_id) {
            Some(v) => {
                if let Some(sender) = &v.sender {
                    println!("sending pong");
                    let _ = sender.send(Ok(Message::text("pong")));
                }
            }
            None => return,
        }
        return;
    };
}
Let’s quickly review the main points again:
    let (client_ws_sender, mut client_ws_rcv) = ws.split();
    let (client_sender, client_rcv) = mpsc::unbounded_channel();

    let client_rcv = UnboundedReceiverStream::new(client_rcv);

    tokio::task::spawn(client_rcv.forward(client_ws_sender).map(|result| {
        if let Err(e) = result {
            println!("error sending websocket msg: {}", e);
        }
    }));
Here we split the WebSocket stream object into separate Sink and Stream objects. This allows us to receive messages from the client and send messages to the client in separate areas of the code.
On line 16-21 we spawn a new task that keeps the client_ws_sender stream open until the client has disconnected.
    let uuid = Uuid::new_v4().to_simple().to_string();

    let new_client = Client {
        client_id: uuid.clone(),
        sender: Some(client_sender),
    };

    clients.lock().await.insert(uuid.clone(), new_client);
The following while loop handles receiving messages from the client:
    while let Some(result) = client_ws_rcv.next().await {
        let msg = match result {
            Ok(msg) => msg,
            Err(e) => {
                println!("error receiving message for id {}): {}", uuid.clone(), e);
                break;
            }
        };
        client_msg(&uuid, msg, &clients).await;
    }
This while loop will run until the client is disconnected. If a message is received, the code in the while loop will call client_msg to do further processing of the message.
The client_msg function looks like this:
async fn client_msg(client_id: &str, msg: Message, clients: &Clients) {
    println!("received message from {}: {:?}", client_id, msg);

    let message = match msg.to_str() {
        Ok(v) => v,
        Err(_) => return,
    };

    if message == "ping" || message == "ping\n" {
        let locked = clients.lock().await;
        match locked.get(client_id) {
            Some(v) => {
                if let Some(sender) = &v.sender {
                    println!("sending pong");
                    let _ = sender.send(Ok(Message::text("pong")));
                }
            }
            None => return,
        }
        return;
    };
}
The code tries to convert msg to a string, and if successful, responds to it if the message is “ping”. To send the response, we first obtain a lock on the clients and then get the client by its client id. We then use the sender field to send a message to the connected client.
Warp WebSocket server code base: workers.rs
This is where we have an infinite loop “gather data” for our crypto triangle arbitrage dashboard and send it to connected clients every two seconds:
use crate::Clients;
use chrono::{DateTime, Utc};
use rand::prelude::*;
use serde::Serialize;
use tokio;
use tokio::time::Duration;
use warp::ws::Message;

#[derive(Serialize)]
struct TestData {
    widget_type: String,
    widget_count: u32,
    creation_date: DateTime<Utc>,
}

pub async fn main_worker(clients: Clients) {
    loop {
        tokio::time::sleep(Duration::from_millis(2000)).await;

        let connected_client_count = clients.lock().await.len();
        if connected_client_count == 0 {
            println!("No clients connected, skip sending data");
            continue;
        }
        println!("{} connected client(s)", connected_client_count);

        let test_data_batch = generate_random_data();
        clients.lock().await.iter().for_each(|(_, client)| {
            if let Some(sender) = &client.sender {
                let _ = sender.send(Ok(Message::text(
                    serde_json::to_string(&test_data_batch).unwrap(),
                )));
            }
        });
    }
}

fn generate_random_data() -> Vec<TestData> {
    let mut rng = rand::thread_rng();
    let mut test_data_batch = Vec::new();
    for i in 0..10 {
        test_data_batch.push(TestData {
            widget_type: String::from(format!("widget{}", i)),
            widget_count: rng.gen_range(0..100),
            creation_date: Utc::now(),
        });
    }
    return test_data_batch;
}
There are two main parts from this code that we’re going to keep for our triangle arbitrage dashboard backend:
- We will have some serializable data structure to represent the data.
- The loop checking to see if clients are connected and then retrieving data from a source and then sending that data to the clients.
A serializable data structure example:
#[derive(Serialize)]
struct TestData {
    widget_type: String,
    widget_count: u32,
    creation_date: DateTime<Utc>,
}
The main loop checking for connected clients:
pub async fn main_worker(clients: Clients) {
    loop {
        tokio::time::sleep(Duration::from_millis(2000)).await;

        let connected_client_count = clients.lock().await.len();
        if connected_client_count == 0 {
            println!("No clients connected, skip sending data");
            continue;
        }
        println!("{} connected client(s)", connected_client_count);

        let test_data_batch = generate_random_data();
        clients.lock().await.iter().for_each(|(_, client)| {
            if let Some(sender) = &client.sender {
                let _ = sender.send(Ok(Message::text(
                    serde_json::to_string(&test_data_batch).unwrap(),
                )));
            }
        });
    }
}
We can see on lines 28-34 that data is sent by iterating through the clients list. Then, using the sender object to send the data serialized to a string thanks to serde_json::to_string.
We will remove the data generation code in a later section in this article. We don’t need to generate data as we are about to get data from a real source.
Binance client code base: main.rs
The important thing we have to look at here is the way we are connecting to the Binance WebSocket API using the tungstenite crate.
The full code listing looks like this:
use tungstenite::connect;
use url::Url;

mod models;

static BINANCE_WS_API: &str = "wss://stream.binance.com:9443";
fn main() {
    let binance_url = format!(
        "{}/stream?streams=ethbtc@depth5@100ms/bnbeth@depth5@100ms",
        BINANCE_WS_API
    );
    let (mut socket, response) =
        connect(Url::parse(&binance_url).unwrap()).expect("Can't connect.");

    println!("Connected to binance stream.");
    println!("HTTP status code: {}", response.status());
    println!("Response headers:");
    for (ref header, ref header_value) in response.headers() {
        println!("- {}: {:?}", header, header_value);
    }

    loop {
        let msg = socket.read_message().expect("Error reading message");
        let msg = match msg {
            tungstenite::Message::Text(s) => s,
            _ => {
                panic!("Error getting text");
            }
        };

        let parsed: models::DepthStreamWrapper = serde_json::from_str(&msg).expect("Can't parse");
        for i in 0..parsed.data.asks.len() {
            println!(
                "{}: {}. ask: {}, size: {}",
                parsed.stream, i, parsed.data.asks[i].price, parsed.data.asks[i].size
            );
        }
    }
}
We use connect from tungstenite to attempt to connect to the Binance WebSocket URL:
let (mut socket, response) = connect(Url::parse(&binance_url).unwrap()).expect("Can't connect.");
If the connection succeeds we get a response and a socket. The response contains header information and the socket can be used to listen for messages:
   loop {
        let msg = socket.read_message().expect("Error reading message");
        let msg = match msg {
            tungstenite::Message::Text(s) => s,
            _ => {
                panic!("Error getting text");
            }
        };

        let parsed: models::DepthStreamWrapper = serde_json::from_str(&msg).expect("Can't parse");
        for i in 0..parsed.data.asks.len() {
            println!(
                "{}: {}. ask: {}, size: {}",
                parsed.stream, i, parsed.data.asks[i].price, parsed.data.asks[i].size
            );
        }
    }
Here we read messages from the socket using socket.read_message in an infinite loop. We deserialize messages using serde_json::from_str. We deserialize to a data structure called DepthStreamWrapper we defined in the models module.
Binance client code base: models.rs
This module contains the struct definitions for the data we intend to receive from the Binance WebSocket streams. Furthermore, there is a function for deserializing a String to a float (de_float_from_str):
use serde::de;
use serde::{Deserialize, Deserializer};

#[derive(Debug, Deserialize)]
pub struct OfferData {
    #[serde(deserialize_with = "de_float_from_str")]
    pub price: f32,
    #[serde(deserialize_with = "de_float_from_str")]
    pub size: f32,
}

#[derive(Debug, Deserialize)]
#[serde(rename_all = "camelCase")]
pub struct DepthStreamData {
    pub last_update_id: u32,
    pub bids: Vec<OfferData>,
    pub asks: Vec<OfferData>,
}

pub fn de_float_from_str<'a, D>(deserializer: D) -> Result<f32, D::Error>
where
    D: Deserializer<'a>,
{
    let str_val = String::deserialize(deserializer)?;
    str_val.parse::<f32>().map_err(de::Error::custom)
}

#[derive(Debug, Deserialize)]
pub struct DepthStreamWrapper {
    pub stream: String,
    pub data: DepthStreamData,
}
Now that we have refreshed ourselves on the code from the previous articles, we can start combining the codebases and make changes and additions.
Combining the code bases and clean up
This is the first step to building our crypto triangle arbitrage dashboard backend. We are now going to combine the two code bases. While we are at it we will also remove unnecessary code.
As mentioned earlier we will use https://github.com/tmsdev82/warp-update-loop-tutorial as a base. So, copy/clone the code in that repository.
Updating Cargo.toml
The first thing we will update are the dependencies in Cargo.toml:
[package]
name = "rust-triangle-arbitrage-dashboard-tutorial"
version = "0.1.0"
edition = "2018"

# See more keys and their definitions at https://doc.rust-lang.org/cargo/reference/manifest.html

[dependencies]
tokio = { version= "1", features = ["full"] }
tokio-stream = "0.1.6"
warp = "0.3"
serde = { version = "1.0", features = ["derive"]}
serde_json = "1.0"
futures = { version = "0.3", default-features=false}
uuid = { version = "0.8.2", features = ["serde", "v4"]}
tungstenite = { version="0.14.0", features = ["rustls-tls"]}
url = "2.1.0"
From the Binance WebSocket repo, we added tungstenite and url, see highlighted lines.
Adding models.rs
Another simple addition is simply copying over the entire models.rs file to our new project. See the previous section “Binance client code base: models.rs”. We have to then also add a mod models; line to main.rs to where the other modules are defined:
mod handlers;
mod models;
mod workers;
mod ws;
Updating main.rs: connect to Binance WebSocket streams
Here we will add code to main.rs for connecting to the Binance WebSocket streams, and then pass that socket connection object to our main_worker function. The following are code snippets of main.rs with updated lines of code:
use std::{collections::HashMap, convert::Infallible, sync::Arc};
use tokio::sync::{mpsc, Mutex};
use url::Url;
use warp::{ws::Message, Filter, Rejection};

mod handlers;
mod models;
mod workers;
mod ws;

static BINANCE_WS_API: &str = "wss://stream.binance.com:9443";
We added an import for url::Url to parse the Binance URL string, mod models; mentioned earlier, and a static string representing the base URL for the Binance streams API.
Next, we connect to the Binance server and pass the resulting socket connection to workers::main_worker:
    println!("Connecting to binance stream...");
    let binance_url = get_binance_streams_url();
    let (socket, response) = tungstenite::connect(binance_url).expect("Can't connect.");
    println!("Connected to binance stream.");
    println!("HTTP status code: {}", response.status());
    println!("Response headers:");
    for (ref header, ref header_value) in response.headers() {
        println!("- {}: {:?}", header, header_value);
    }

    println!("Starting update loop");
    tokio::task::spawn(async move {
        workers::main_worker(clients.clone(), socket).await;
    });
In the next section, we will update main_worker from the workers module to use the socket to receive messages.
Updating workers.rs: receive message from the Binance connection
We will get rid of the generate_random_data function, as we no longer need it. In the main_worker function we will add the code to receive data from the Binance socket connection after the check for the number of clients:
        println!("{} connected client(s)", connected_client_count);

        let msg = socket.read_message().expect("Error reading message");
        let msg = match msg {
            tungstenite::Message::Text(s) => s,
            _ => {
                panic!("Error getting text");
            }
        };

        let parsed: models::DepthStreamWrapper = serde_json::from_str(&msg).expect("Can't parse");
        for i in 0..parsed.data.asks.len() {
            println!(
                "{}: {}. ask: {}, size: {}",
                parsed.stream, i, parsed.data.asks[i].price, parsed.data.asks[i].size
            );
        }
And, then, the part where we sent test_data_batch to the clients, we will instead send the parsed Binance data:
        clients.lock().await.iter().for_each(|(_, client)| {
            if let Some(sender) = &client.sender {
                let _ = sender.send(Ok(Message::text(serde_json::to_string(&parsed).unwrap())));
            }
        });
The full code listing for workers.rs will result in:
use crate::{models, Clients};
use tokio::time::Duration;
use tungstenite::{client::AutoStream, WebSocket};
use warp::ws::Message;

pub async fn main_worker(clients: Clients, mut socket: WebSocket<AutoStream>) {
    loop {
        tokio::time::sleep(Duration::from_millis(2000)).await;

        let connected_client_count = clients.lock().await.len();
        if connected_client_count == 0 {
            println!("No clients connected, skip sending data");
            continue;
        }
        println!("{} connected client(s)", connected_client_count);

        let msg = socket.read_message().expect("Error reading message");
        let msg = match msg {
            tungstenite::Message::Text(s) => s,
            _ => {
                panic!("Error getting text");
            }
        };

        let parsed: models::DepthStreamWrapper = serde_json::from_str(&msg).expect("Can't parse");
        for i in 0..parsed.data.asks.len() {
            println!(
                "{}: {}. ask: {}, size: {}",
                parsed.stream, i, parsed.data.asks[i].price, parsed.data.asks[i].size
            );
        }

        clients.lock().await.iter().for_each(|(_, client)| {
            if let Some(sender) = &client.sender {
                let _ = sender.send(Ok(Message::text(serde_json::to_string(&parsed).unwrap())));
            }
        });
    }
}
The compiler/rust analyzer will complain that Serialize is not implemented for DepthStreamWrapper, so let’s update models.rs now to resolve this issue.
Updating models.rs: make everything serializable
We can fix the issue of Serialize not being implemented by simply adding the Serialize attribute to all the struct definitions. While were are at it, let’s also add Clone as well. Which will come in handy later when processing the data, like so:
use serde::de;
use serde::{Deserialize, Deserializer, Serialize};

#[derive(Debug, Deserialize, Serialize, Clone)]
pub struct OfferData {
    #[serde(deserialize_with = "de_float_from_str")]
    pub price: f64,
    #[serde(deserialize_with = "de_float_from_str")]
    pub size: f64,
}

#[derive(Debug, Deserialize, Serialize, Clone)]
#[serde(rename_all = "camelCase")]
pub struct DepthStreamData {
    pub last_update_id: u32,
    pub bids: Vec<OfferData>,
    pub asks: Vec<OfferData>,
}

pub fn de_float_from_str<'a, D>(deserializer: D) -> Result<f64, D::Error>
where
    D: Deserializer<'a>,
{
    let str_val = String::deserialize(deserializer)?;
    str_val.parse::<f64>().map_err(de::Error::custom)
}

#[derive(Debug, Deserialize, Serialize, Clone)]
pub struct DepthStreamWrapper {
    pub stream: String,
    pub data: DepthStreamData,
}
Thanks to these simple changes, all the objects are now serializable to strings.
Running the result of the combined code bases
We have finally combined the code from the previous articles into one. That means we are almost ready to start working on the good part, the data processing for triangle arbitrage. However, it is good to take a pause here and test the current state of the code, by running it. If all went well, the current state of the code will simply pass the data from the Binance depth streams to the clients connected to our webserver.
The terminal output should look something like this, up until a client connects:
Configuring websocket route
Connecting to binance stream...
Connected to binance stream.
HTTP status code: 101 Switching Protocols
Response headers:
- date: "Sun, 25 Jul 2021 19:15:27 GMT"
- connection: "upgrade"
- upgrade: "websocket"
- sec-websocket-accept: "rwzRG1RpHIoA2oUKgzyh1m3+b8Y="
Starting update loop
Starting server
No clients connected, skip sending data
ws_handler
establishing client connection... WebSocket
1 connected client(s)
ethbtc@depth5@100ms: 0. ask: 0.062665, size: 0.042
ethbtc@depth5@100ms: 1. ask: 0.062669, size: 0.02
ethbtc@depth5@100ms: 2. ask: 0.062671, size: 0.11
ethbtc@depth5@100ms: 3. ask: 0.062672, size: 1.145
ethbtc@depth5@100ms: 4. ask: 0.062678, size: 3.913
1 connected client(s)
bnbeth@depth5@100ms: 0. ask: 0.13843, size: 37.264
bnbeth@depth5@100ms: 1. ask: 0.13844, size: 0.609
bnbeth@depth5@100ms: 2. ask: 0.13846, size: 2.335
bnbeth@depth5@100ms: 3. ask: 0.13849, size: 1.1
bnbeth@depth5@100ms: 4. ask: 0.13851, size: 44.402
The client will receive data like this:
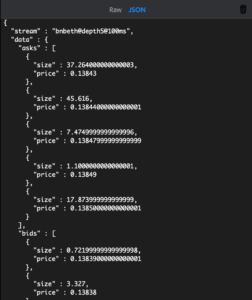
Crypto triangle arbitrage data
In this section, we are going to look at how to get data for triangle arbitrage. Naturally, We will also write code to calculate the potential profit of a triangle. This is the final step to complete the crypto triangle arbitrage dashboard backend.
The information we need for triangle arbitrage is 3 coin pairs, where the coins in the pairs form a link with each other. For example, BTC->ETH->BNB->BTC. Using this sequence, we calculate potential profit for a scenario where will use BTC to buy ETH, then use ETH to buy BNB, and finally use BNB to buy BTC again. If we end up with more BTC than we started with, we will have made a profit. Let’s say we use 1 BTC to buy the ETH and then finally are able to buy 1.05 BTC with the BNB, we will have made 5% profit.
The available pairs in the Binance API are: ETH-BTC, BNB-ETH, and BNB-BTC. Since we only get data on one of the pairs at a time when we call socket.read_message(), we need some way to collect that data and only act on it if we have data from all the pairs that form the triangle sequence.
Calculating the triangle
Let’s use the triangle mentioned before, BTC-ETH-BNB, as our example with the following pairs: ETH-BTC, BNB-ETH, and BNB-BTC. We will update the lines that configure the URL in main.rs on lines 23-26:
    let binance_url = format!(
        "{}/stream?streams=ethbtc@depth5@100ms/bnbeth@depth5@100ms/bnbbtc@depth@100ms",
        BINANCE_WS_API
    );
With the 3 pairs configured, we will use these pairs to calculate the potential profits of trading pairs. To make the calculation simple, we will ignore available volume and ignore trading fees.
The following function will perform the calculation of if I put in X amount of coin A, how much of coin B do I get? We will call this function for each of the pairs that make up the triangle trade, the explanation follows:
fn calc_triangle_step(
    trade_amount: f64,
    ask_price: f64,
    bid_price: f64,
    pair_name: &str,
    triangle_part: &str,
) -> f64 {
    // Compare first part of the part to the part of the triangle
    // to determine on what side of the trade we should be
    if pair_name[..triangle_part.len()] == *triangle_part {
        // sell side
        trade_amount * bid_price
    } else {
        // buy side
        trade_amount / ask_price
    }
}
The parameters represent the following:
trade_amount: how much of a coin we are trading for the target.ask_price: the ask price for the pairing. Whether we need the ask price or the bid price will be determined in the function itself.bid_price: the bid price for the pairing.pair_name: the name of the pair as it is known in the Binance API, for example:ethbtc. Used to determine which formula to use.triangle_part: the part of the triangle we are currently considering, what coin we are trading for the other in the pair, for example:btc. Used to determine which formula to use.
Let’s use the triangle arbitrage scenario to look at how this function is used. We start with the data on the ETH-BTC pair and go through there.
- We will use 1 BTC to buy ETH, let’s say that the ask price is 0.062 and the buy price 0.061.
- The parameters will look like this:
calc_triangle_step(1, 0.062, 0.061, "ethbtc", "btc"). - On line 137 “btc” is not the first part of the pair, so we are on the buy side of the trade. Using BTC to buy ETH.
- The amount of ETH we get for 1 BTC:
1 / 0.062 = ~16.13 - Next we use 16.13 ETH to buy BNB, let’s say the ask price is 0.1313 and the bid price 0.1312.
- The parameters will look like this:
calc_triangle_step(16.13, 0.1313, 0.1312, "bnbeth", "eth"). - On line 137 “eth” is not the first part of the pair, so we are on the buy side of the trade. Using ETH to buy BNB.
- The amount of BNB we get for 16.13 ETH:
16.13 / 0.1313 =~122.84 - Finally we use the 122.84 BNB to buy BTC, let’s say the ask price is 0.008185 and the bid price is 0.008184.
- The parameters will look like this:
calc_triangle_step(122.84, 0.008185, 0.008184, "bnbbtc", "bnb"). - On line 137 “bnb” is the first part of the pair, so we are on the sell side of the trade. Using BNB to sell for BTC.
- The amount of BTC we get for 122.84 BNB:
122.84 * 0.008184 =~1.0053.
The example trades would yield 0.0053 BTC profit. That is about 0.5% profit. Not bad, but it is a hypothetical situation and certain factors have not been taken into account like trading fees.
Now that we have an understanding of how we can calculate potential profits, we need to write the code that feeds the calculation function with the data it needs.
Processing the data
Here we will write a new function process_triangle_data which takes a HashMap of DepthStreamWrapper and takes 3 coin pairs from it and uses that data to call calc_triangle_step:
async fn process_triangle_data(
    pairs_data: &HashMap<String, DepthStreamWrapper>,
    start_pair: &str,
    mid_pair: &str,
    end_pair: &str,
    triangle: [&str; 3],
    clients: Clients,
) {
    println!(
        "processing triangle {:?}: {}->{}->{}",
        triangle, start_pair, mid_pair, end_pair
    );

    let data = (
        pairs_data.get(start_pair),
        pairs_data.get(mid_pair),
        pairs_data.get(end_pair),
    );

    let (start_pair_data, mid_pair_data, end_pair_data) = match data {
        (Some(s), Some(m), Some(e)) => (s, m, e),
        _ => {
            println!(
                "{:?} One or more of the pairs were not found, skipping",
                (start_pair, mid_pair, end_pair)
            );
            return;
        }
    };

    let mut profits: Vec<f64> = Vec::new();

    for i in 0..start_pair_data.data.asks.len() {
        let mut triangle_profit = calc_triangle_step(
            1.0,
            start_pair_data.data.asks[i].price,
            start_pair_data.data.bids[i].price,
            start_pair,
            triangle[0],
        );
        triangle_profit = calc_triangle_step(
            triangle_profit,
            mid_pair_data.data.asks[i].price,
            mid_pair_data.data.bids[i].price,
            mid_pair,
            triangle[1],
        );
        triangle_profit = calc_triangle_step(
            triangle_profit,
            end_pair_data.data.asks[i].price,
            end_pair_data.data.bids[i].price,
            end_pair,
            triangle[2],
        );

        profits.push((100.0 * triangle_profit) - 100.0);
    }

    println!("{:?} potential profits: {:?}", triangle, profits);
    let triangle_data = models::TriangleArbitrageData {
        start_pair_data: start_pair_data.clone(),
        mid_pair_data: mid_pair_data.clone(),
        end_pair_data: end_pair_data.clone(),
        profits,
        triangle: [
            triangle[0].to_string(),
            triangle[1].to_string(),
            triangle[2].to_string(),
        ],
    };

    clients.lock().await.iter().for_each(|(_, client)| {
        if let Some(sender) = &client.sender {
            let _ = sender.send(Ok(Message::text(
                serde_json::to_string(&triangle_data).unwrap(),
            )));
        }
    });
}
Let’s go through the function piece by piece, starting with the parameters:
async fn process_triangle_data(
    pairs_data: &HashMap<String, DepthStreamWrapper>,
    start_pair: &str,
    mid_pair: &str,
    end_pair: &str,
    triangle: [&str; 3],
    clients: Clients,
) {
The parameters are explained as follows:
pairs_data: AHashMapof ask and bid data for a particular pair of coins.start_pair: the first pair of the triangle. For example: “ethbtc”.mid_pair: the second pair of the triangle. For example: “bnbeth”.end_pair: the last pair of the triangle. For example: “bnbbtc”.triangle: array of &str containing coin symbols that make up the triangle in order. For example: btc, eth, bnb.clients: list of connected clients to send the calculated profit data to.
    let data = (
        pairs_data.get(start_pair),
        pairs_data.get(mid_pair),
        pairs_data.get(end_pair),
    );

    let (start_pair_data, mid_pair_data, end_pair_data) = match data {
        (Some(s), Some(m), Some(e)) => (s, m, e),
        _ => {
            println!(
                "{:?} One or more of the pairs were not found, skipping",
                (start_pair, mid_pair, end_pair)
            );
            return;
        }
    };
Here we attempt to grab data from the HashMap for the pairs we are interested in and put them in a tuple (line 61-65). Then we go into a match clause to see each piece has a value, if not, we exit the function. Otherwise, we can continue. In the next part we call the calc_triangle_step function to calculate potential profits:
    let mut profits: Vec<f64> = Vec::new();

    for i in 0..start_pair_data.data.asks.len() {
        let mut triangle_profit = calc_triangle_step(
            1.0,
            start_pair_data.data.asks[i].price,
            start_pair_data.data.bids[i].price,
            start_pair,
            triangle[0],
        );
        triangle_profit = calc_triangle_step(
            triangle_profit,
            mid_pair_data.data.asks[i].price,
            mid_pair_data.data.bids[i].price,
            mid_pair,
            triangle[1],
        );
        triangle_profit = calc_triangle_step(
            triangle_profit,
            end_pair_data.data.asks[i].price,
            end_pair_data.data.bids[i].price,
            end_pair,
            triangle[2],
        );

        profits.push(triangle_profit - 1.0);
    }
In this part, we create a Vec to hold the profit values and then loop through the length of the ask list. We then call calc_triangle_step three times, one for each triangle part. Starting with 1 for the amount parameter, and then using the result of the calculation as the amount for each following call of calc_triangle_step. Finally, we subtract 1 from the final value, the leftover value is the profit (in BTC in this case) because we started the trade with 1. Then, we add the calculated value to the vector. We are almost ready to send this data to the clients.
Before we can do that though, let’s create a new struct in models.rs representing all the data we want to send to the clients regarding the profit calculation:
#[derive(Debug, Serialize, Clone)]
pub struct TriangleArbitrageData {
    pub triangle: [String; 3],
    pub profits: Vec<f64>,
    pub start_pair_data: DepthStreamWrapper,
    pub mid_pair_data: DepthStreamWrapper,
    pub end_pair_data: DepthStreamWrapper,
}
Using this struct we can send the triangle representing the names of coins making up the triangle arbitrage, the profit values, and we are also sending all the trading data we have collected for each trading coin pair.
Now we can send the data to the clients, continuing with the code in the process_triangle_data function in workers.rs:
 let triangle_data = models::TriangleArbitrageData {
        start_pair_data: start_pair_data.clone(),
        mid_pair_data: mid_pair_data.clone(),
        end_pair_data: end_pair_data.clone(),
        profits,
        triangle: [
            triangle[0].to_string(),
            triangle[1].to_string(),
            triangle[2].to_string(),
        ],
    };

    clients.lock().await.iter().for_each(|(_, client)| {
        if let Some(sender) = &client.sender {
            let _ = sender.send(Ok(Message::text(
                serde_json::to_string(&triangle_data).unwrap(),
            )));
        }
    });
Here we simply fill in the fields of the TriangleArbitrageData object, and then use the familiar method of looping through clients and calling send on the sender object to send the data to the connected clients.
Collecting the data in our data loop
The last thing we need to do is update the loop in the main_worker function in workers.rs. We will store the incoming depth data in a HashMap and use that in calls to process_triangle_data.
pub async fn main_worker(clients: Clients, mut socket: WebSocket<AutoStream>) {
    let mut pairs_data: HashMap<String, DepthStreamData> = HashMap::new();
    loop {
         tokio::time::sleep(Duration::from_millis(60)).await;
         let connected_client_count = clients.lock().await.len();
On line 12 we have the pairs_data HashMap that will contain the depth data for the coin pairs. We should also reduce the sleep time while we are at it so we can process the data faster. Be careful about removing the sleep time, because removing the sleep time entirely might overwhelm any clients (for example the frontend we will be building in a later article).
        let parsed: models::DepthStreamWrapper = serde_json::from_str(&msg).expect("Can't parse");

        let pair_key = parsed.stream.split_once("@").unwrap().0;
        pairs_data.insert(pair_key.to_string(), parsed);

        process_triangle_data(
            &pairs_data,
            "ethbtc",
            "bnbeth",
            "bnbbtc",
            ["btc", "eth", "bnb"],
            clients.clone(),
        )
        .await;
In this last part, we parse the message from the Binance API and deserialize it into a DepthStreamWrapper object. We then grab the coin pair names from the stream field to use as key for the pairs_data HashMap. Finally, we call the process_triangle_data with the configuration for the triangle of pairs that we are interested in.
Running the completed code
We have completed all the necessary work for collecting data, calculating potential profits, and sending the data to the connected clients. Now we can run the crypto triangle arbitrage dashboard server and connect to it to see what the results look like.
Let’s run the code and connect. The terminal output will look like this:
No clients connected, skip sending data
1 connected client(s)
processing triangle ["btc", "eth", "bnb"]: ethbtc->bnbeth->bnbbtc
("ethbtc", "bnbeth", "bnbbtc") One or more of the pairs were not found, skipping
1 connected client(s)
processing triangle ["btc", "eth", "bnb"]: ethbtc->bnbeth->bnbbtc
("ethbtc", "bnbeth", "bnbbtc") One or more of the pairs were not found, skipping
1 connected client(s)
processing triangle ["btc", "eth", "bnb"]: ethbtc->bnbeth->bnbbtc
["btc", "eth", "bnb"] potential profits: [0.000055617210749314694, -0.000309395949426583, -0.0005651334913208128, -0.0007752558734454018, -0.0011550954732546526]
1 connected client(s)
processing triangle ["btc", "eth", "bnb"]: ethbtc->bnbeth->bnbbtc
["btc", "eth", "bnb"] potential profits: [0.000055617210749314694, -0.000309395949426583, -0.0005651334913208128, -0.0007752558734454018, -0.0011550954732546526]
1 connected client(s)
The data sent to the clients will look like this:
{
  "mid_pair_data" : {
    "stream" : "bnbeth@depth5@100ms",
    "data" : {
      "bids" : [
        {
          "size" : 0.23200000000000001,
          "price" : 0.12917000000000001
        },
        {
          "size" : 0.27400000000000002,
          "price" : 0.12914
        },
        {
          "size" : 3.6579999999999999,
          "price" : 0.12912000000000001
        },
        {
          "size" : 32.420000000000002,
          "price" : 0.12911
        },
        {
          "size" : 11.035,
          "price" : 0.12909999999999999
        }
      ],
      "lastUpdateId" : 933056340,
      "asks" : [
        {
          "size" : 0.13900000000000001,
          "price" : 0.12917999999999999
        },
        {
          "size" : 4.7930000000000001,
          "price" : 0.12920999999999999
        },
        {
          "size" : 37.323,
          "price" : 0.12922
        },
        {
          "size" : 0.111,
          "price" : 0.12923000000000001
        },
        {
          "size" : 0.126,
          "price" : 0.12926000000000001
        }
      ]
    }
  },
  "start_pair_data" : {
    "stream" : "ethbtc@depth5@100ms",
    "data" : {
      "bids" : [
        {
          "size" : 21.669,
          "price" : 0.065795000000000006
        },
        {
          "size" : 0.28599999999999998,
          "price" : 0.065790000000000001
        },
        {
          "size" : 0.64600000000000002,
          "price" : 0.065789
        },
        {
          "size" : 0.085000000000000006,
          "price" : 0.065786999999999998
        },
        {
          "size" : 6.1219999999999999,
          "price" : 0.065783999999999995
        }
      ],
      "lastUpdateId" : 3807060057,
      "asks" : [
        {
          "size" : 4.907,
          "price" : 0.065795999999999993
        },
        {
          "size" : 3.77,
          "price" : 0.065797999999999995
        },
        {
          "size" : 5.3659999999999997,
          "price" : 0.065803
        },
        {
          "size" : 1.077,
          "price" : 0.065804000000000001
        },
        {
          "size" : 0.153,
          "price" : 0.065805000000000002
        }
      ]
    }
  },
  "end_pair_data" : {
    "stream" : "bnbbtc@depth5@100ms",
    "data" : {
      "bids" : [
        {
          "size" : 125.37,
          "price" : 0.0085000000000000006
        },
        {
          "size" : 17.870000000000001,
          "price" : 0.0084989999999999996
        },
        {
          "size" : 3.1099999999999999,
          "price" : 0.0084969999999999993
        },
        {
          "size" : 39.479999999999997,
          "price" : 0.0084960000000000001
        },
        {
          "size" : 74.170000000000002,
          "price" : 0.0084950000000000008
        }
      ],
      "lastUpdateId" : 2109002030,
      "asks" : [
        {
          "size" : 6.04,
          "price" : 0.0085019999999999991
        },
        {
          "size" : 18.34,
          "price" : 0.0085030000000000001
        },
        {
          "size" : 4.6600000000000001,
          "price" : 0.0085039999999999994
        },
        {
          "size" : 10.869999999999999,
          "price" : 0.0085050000000000004
        },
        {
          "size" : 81.340000000000003,
          "price" : 0.0085059999999999997
        }
      ]
    }
  },
  "triangle" : [
    "btc",
    "eth",
    "bnb"
  ],
  "profits" : [
    0.000055617210749314694,
    -0.0003245892775527448,
    -0.0007131147363421686,
    -0.0009232193830603919,
    -0.0012878390376491744
  ]
}
Conclusion
This completes the implementation of our rudimentary crypto triangle arbitrage dashboard backend. We gathered data from 3 coin trading pairs, ran them through a simple algorithm to calculate potential profits, and then send data about the triangle arbitrage to connected clients. The next step for us is to display this data in an easy-to-view way in a frontend dashboard. We will set up a simple frontend in the following article.
The completed code project can be found on my GitHub, here.
To continue this series, part 2 implements a basic frontend in React, click here.
Part 3 is about logging: Crypto triangle arbitrage dashboard, part 3: how to add logging.