We are going to build a simple dockerized Flask RESTful API for managing collectors items. We will do this by implementing a simple REST API that let’s a client application manipulate a collectors_item resource. The REST API we will build will allow create, read, update, and delete actions on collectors_items. We will use the Python library Flask to do this. Together with a number of Flask plugins to make things easier. At the end we will also dockerize this API.
In will continue to build out this project in other tutorials. For that reason, we need a solid, scalable foundation, instead of simple one file python flask app.
The completed project can be found in the following github repository: https://github.com/tmsdev82/collectors-items-at-rest.
Contents
- 1 Prerequisites
- 2 What we are going to use
- 3 Steps
- 4 Set up the project environment
- 5 Set up a scalable file structure
- 6 Install packages
- 7 Building the backend
- 8 Dockerization
- 9 Conclusion
- 10 Next steps
Prerequisites
What you need to be able to follow this tutorial to build a dockerized Flask RESTful API comfortably.
This tutorial is written for python 3.6 but using higher versions of python should not be a problem either. I’m using ubuntu, so certain commands we will use might be specific to Linux based systems and ubuntu in particular.
If you are unfamiliar with Docker I have an article explaining the basics of Docker and why it is useful: What is Docker and why is it used: quick primer.
What we are going to use
Here I’m listing the main overview of what we are going to use:
- Backend framework: Flask
- REST API plugin: Flask RESTX
- CORS plugin: Flask CORS
- DB ORM plugin: Flask SQL Alchemy
- Server runner: gunicorn
- Database for testing: SQLite
- Containerization platform: Docker
Steps
These are the steps we will take to come to a dockerized flask backend:
- Set up project environment
- Set up scalable file structure
- Implement flask set up
- Implement end points
- Dockerize the flask app
Set up the project environment
Let us start by creating the initial directory for our collectors_item management REST API. I personally like to work with a simple venv environment for my projects.
Create the initial directory: mkdir collectors-at-rest or whatever name you prefer. Create a venv environment, for example: python3 -m venv venv or python -m venv venv. This will create a directory called venv. If you’re using a version control (like git) don’t forget to add the venv directory to the ignore files.
Activate the environment: source ./venv/bin/activate in the case of linux. We should update pip right away. While the environment is active: python -m pip install --upgrade pip.
Set up a scalable file structure
We are going to create the initial files and folders. The structure I recommend looks like this:
collectors_items-at-rest
+ manage.py
+ requirements.txt
+ .env
+--app
   +__init__.py
   +--main
      +__init__.py
      + config.py
      +--collectors_item
         +--controllers
            + collectors_item_controller.py
         +--services
            + collectors_item_service.py
         +--models
            + collectors_item_model.py
        +--schemas
            + collectors_item_schema.py
   +--utils
      +loggers.py
After a short overview of what the files will contain, we will go into detail on what’s happening in each of these files as we write the code:
Root directory
In the root directory we will create manage.py which will be the entry point for the app. This will contain the basic start up code for the flask backend.
Next is: requirements.txt which is, of course, the file that defines all the package dependencies. We can create an empty file now or after installing the python packages we can create/fill it by using the pip freeze > requirements.txt command.
The .env file in the root directory is used to set certain environment variables. For example to configure which file the flask app exists in (in our case manage.py)
App directory
We’ll put the actual backend code in a sub directory app to keep the root directory clean. The file __init__.py under the app directory will contain code for initializing the endpoint namespaces for this backend.
The main directory and its sub directories will contain the backend’s core code. There is a __init__.py under main as well, which will contain a function to initialize the flask app and any plugins we want to use. Here another config.py which will configure the flask config variables.
The utils directory will contain commonly used useful modules like code to instance a logger object for example.
collectors_items directory
Finally we have the collectors_items directory under ./app/main which contains directory and files that represent the collectors_item resource and its operations. We have three main parts controllers, services, and models.
- Controllers represent the endpoints clients can talk to.
- Services are modules that perform business logic.
- Models represent the database objects.
- Schemas, these represent expected input and output for the endpoints, they help document the endpoint and can be used to enforce rules on incoming data, so that requests with data that doesn’t conform to the schema get rejected.
Now that we have our initial project directory structure in order, let’s install all the dependencies we are going to need.
Install packages
I personally like using the python module venv to create a virtual environment to install packages into. Use venv with the following command python3 -m venv venv this will create a vritual environment in the ./venv directory. To activate the virual environment:
source ./venv/bin/activate
Next the packages:
pip install flask flask-restx flask_sqlalchemy flask_cors gunicorn
Those are all the packages we need for now. We can go ahead and save the dependencies to requirements.txt now: pip freeze > requirements.txt.
Building the backend
The first thing we are going to do is setup the basic flask app. Unlike most other tutorials the setup is a little more involved. But it will a better foundation to build on.
We are going to start with the config file: ./app/main/config.py. Here we will add configurations for the flask app to be used for test, development, and production environments.
./app/main/config.py
Open up ./app/main/config.py and add the following code:
import os

basedir = os.path.abspath(os.path.dirname(__file__))

class Config:
    DEBUG = False
    SECRET_KEY = os.getenv("SECRET_KEY", "the_best_secret_key")

class DevelopmentConfig(Config):
    DEBUG = True
    SQLALCHEMY_TRACK_MODIFICATIONS = False
    SQLALCHEMY_DATABASE_URI = "sqlite:///" + os.path.join(basedir, "development.db")

class TestingConfig(Config):
    DEBUG = True
    SQLALCHEMY_TRACK_MODIFICATIONS = False
    SQLALCHEMY_DATABASE_URI = "sqlite:///"

config_by_name = dict(dev=DevelopmentConfig, test=TestingConfig)

key = Config.SECRET_KEY
For now we will only have configurations for development and testing. When we get ready for dockerization for production we will at a configuration for that as well. We’ll keep it simple like this for now, though.
The main things here are setting DEBUG = True for development and test. Setting this value to true will have the server reload upon code changes, which is useful while we are developing and it will also provide a useful debugger when things go wrong.
Setting SQLALCHEMY_TRACK_MODIFICATIONS = False prevent unneeded overhead on database operations.
Finally SQLALCHEMY_DATABASE_URI is used to set the location of the database. In this case we are using a local sqlite database for both testing and development environments.
./app/utils/loggers.py
Here we will quickly set up an easy way to instantiate a logger in our other files, which will help with debugging our projects in the future.
import sys
import os
import logging

def get_basic_logger(name):
    """ Returns a logging object that logs to std out. """
    basic_formatter = logging.Formatter(
        "%(asctime)s %(module)s %(funcName)s() %(levelname)s: %(message)s"
    )
    logger = logging.getLogger("{}_logger".format(name))
    if os.getenv("LOGGING_LEVEL") == "INFO":
        loglevel = logging.INFO
    elif os.getenv("LOGGING_LEVEL") == "ERROR":
        loglevel = logging.ERROR
    else:
        loglevel = logging.DEBUG

    logger.setLevel(loglevel)

    std_out_log_handler = logging.StreamHandler(sys.stdout)
    std_out_log_handler.setFormatter(basic_formatter)

    logger.addHandler(std_out_log_handler)
    return logger
The get_basic_logger function will be called in other modules to create an instance of a logging object. The log message will show a timestamp, module, function name, logging level name and then the message for each logging line we create. The log level is configurable via the LOGGING_LEVEL environment variable. The default log level is DEBUG.
./app/main/__init__.py
We are going to add code to ./app/main/__init__.py. Then, we can implement a function that returns a configured instance of the flask app:
from flask import Flask
from flask_sqlalchemy import SQLAlchemy
from flask_cors import CORS
from app.main.config import config_by_name
from app.utils import loggers

logger = loggers.get_basic_logger(__name__)
_db = SQLAlchemy()

def create_app(config_name):
    logger.debug(">>>> config_name: {}".format(config_name))

    app = Flask(__name__)
    app.config.from_object(config_by_name[config_name])
    _db.init_app(app)
    CORS(app)

    return app
We implement a function for instantiating the flask app here so it can be managed more easily and for example be used to set up tests more easily. The config_by_name dictionary from ./app/main/config.py is being imported here to be able to retrieve the configuration object based on the parameter config_name passed to create_app.
We are instantiating SQLAlchemy globally with the line _db = SQLAlchemy() so it can be imported into other modules later. SQLAlchemy will be used to create database table definitions and to do database operations.
The CORS object from flask_cors will allow us to do crossite scripting. Which will be needed when we, for example, implement a frontend client in the future.
Now that we have a function that can instantiate the flask app we are ready to actually run the backend app.
./manage.py
After we add a little bit of code to manage.py we will be able to run the flask backend. However, keep in mind that since we don’t have any endpoints yet, that it won’t do much.
import os

from app.main import create_app
from app.utils import loggers

logger = loggers.get_basic_logger(__name__)
app_environment = os.getenv("FLASK_APP_ENV", "dev")
logger.info("Creating app for environment: {}".format(app_environment))
logger.info("Logging level is set to: {}".format(os.getenv("LOGGING_LEVEL", "DEBUG")))
app = create_app(app_environment)

if __name__ == "__main__":
    app.run(threaded=True)
Here we instantiate a logger again. And then get the “environment” configured by the FLASK_APP_ENV environment variable. We default to dev. Then some logging happens that will tell us how certain things are configured, which is good information to know when troubleshooting problems. Finally the app is started with app.run(threaded=True). This will make the development server run in threaded mode so it can handle multiple requests at the same time. When we dockerize this backend we will use a proper server, in this case gunicorn, which can run multiple instances of the flask app using worker processes to handle multiple requests at the same time.
We can now start this flask backend with the command: python manage.py while our virtual environment is active. The app will be available at http://localhost:5000. In the terminal window we will be able to see our debug lines: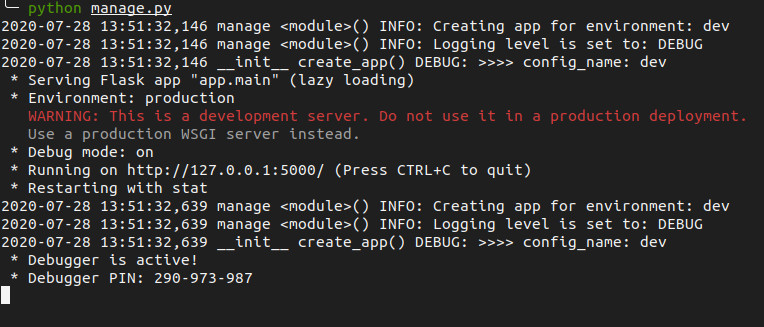
However, since we don’t have any endpoints defined, we will get an error page if we navigate to this address. And a 404 not found error in the terminal.
To have something to show on the root address we will start using flask_restx in ./app/__init__.py.
./app/__init__.py
This is where we will instantiate flask_restx API and load modular namespaces or endpoints.
from flask_restx import Api
from flask import Blueprint

blueprint = Blueprint("api", __name__)

api = Api(blueprint, title="collectors_items at rest backend", version="0.1.0", description="RESTful API for managing collectors_items.")
We then have to add some lines to manage.py. At the imports add:
from app import blueprint
Then below app = create_app(app_environment) add:
app.register_blueprint(blueprint)
app.app_context().push()
Now, if we navigate to http://localhost:5000 in our browsers we will see the swagger UI generated by flask-restx.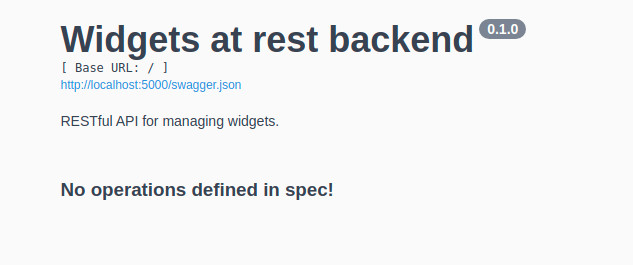
We have not built any endpoints so there is not much to show yet.
Collectors Item endpoints
Here we will go through all the code needed to set up working API endpoints.
Write business logic
We will start with ./app/main/collectors_item/services/collectors_item_service.py which needs some business logic for retrieving.
Let us put down something really simple so we can see how the swagger UI changes when we add an endpoint.
from app.utils import loggers

logger = loggers.get_basic_logger(__name__)

def get_collectors_items():
    logger.debug(">>>>")

    return [], 200
We return an empty array and a 200 (HTTP success status code). Later we will retrieve collectors_item data from the database here instead.
This function will be called by the collectors_item controller we will be implementing next.
Define the endpoint
Open ./app/main/collectors_item/controllers/collectors_item_controller.py and add:
from flask import request
from flask_restx import Resource, Namespace, reqparse

from app.main.collectors_item.services import collectors_item_service
from app.utils import loggers

logger = loggers.get_basic_logger(__name__)

api = Namespace(
    "collectors_items", description="Represents the collectors_items"
)

@api.route("")
class CollectorsItems(Resource):
    @api.doc("Get collectors_items")
    @api.response(200, "Returns a List of collectors_items")
    def get(self):
        return collectors_item_service.get_collectors_items()
Here we set up an endpoint that will be accessible (not yet) at http://localhost:5000/collectors_items.
The most important lines here are:
from flask import request allows us to access information from the request, for example any json payloads sent by the client.
The flask_restx imports Resource and Namespace allow the set up of the end point and reqparse will allow query string parsing in the future. For example this will allow us to handle a request like http://localhost:5000/collectors_items?type=foo or something like that to allow filtering of the return results.
api = Namespace( "collectors_items", description="Represents the collectors_items" ) Defines the endpoint root and sets a description that will be visible on the swagger UI.
The final block of code defines the REST API resource and also the route. Since the route is defined at an empty string, this resource will be available at http://localhost:5000/collectors_items. The name of the class doesn’t particularly matter. It can be anything. But the names of the functions do matter. The function get(self) is called when the API receives a GET HTTP request. Later we will add put, post, and delete functions as well.
The get function returns the result from the get_collectors_items function we defined in ./app/main/collectors_item/services/collectors_item_service.py.
Include the endpoint in the API blueprint
To be able to access this endpoint we need to update ./app/__init__.py and register this namespace there.
from flask_restx import Api
from flask import Blueprint

from app.main.collectors_item.controllers.collectors_item_controller import api as collectors_item_namespace

blueprint = Blueprint("api", __name__)

api = Api(blueprint, title="Collectors_items at rest backend", version="0.1.0", description="RESTful API for managing collectors_items.")

api.add_namespace(collectors_item_namespace)
We added two lines: one for importing the namespace instance “api” from the collectors_item_controller module and a line to add the namespace to the blueprint.
If we refresh the page at http://localhost:5000 (if the flask app is still running) we will see an extra “collectors_items” element which we can click on and expand to see more information: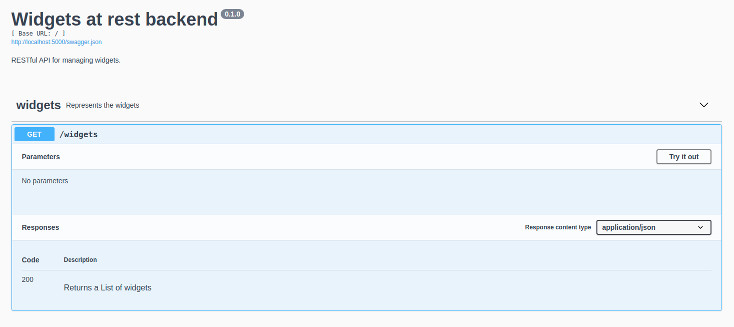
We can even try calling the endpoint from here! If we navigate to http://localhost:5000/collectors_items we can see our empty result. We are well on our way to having a dockerized flask RESTful API.
The next big step will be to add a database model for the collectors_items and an endpoint that will allow creation of new collectors_items records in the database.
Before we do that, though, we should add more detailed documentation to this endpoint by creating a schema.
Get Collectors_items schema
In ./app/main/collectors_item/schemas/collectors_item_schema.py we are going to add the get_collectors_items_schema object, which will define what the output looks like that the client can expect.
get_collectors_item_schema =  {
    "type": "object",
    "properties": {
        "id": {"type": "number"},
        "name": {"type": "string", "minLength": 1},
        "description": {"type": "string"},
        "collectors_item_type": {"type": "string", "minLength": 1},
        "date_added": {"type": "string", "format": "date-time"}
    },
    "required": ["id", "name", "description", "collectors_item_type", "date_added"]
}

get_collectors_items_schema = {
    "type": "array",
    "items": get_collectors_item_schema
}
Here we define a schema for a getting a single collectors_item and then a schema representing an array of collectors_items.
To use this schema for the endpoint we have to update collectors_item_controller.py:
from flask import request
from flask_restx import Resource, Namespace, reqparse

from app.main.collectors_item.services import collectors_item_service
from app.main.collectors_item.schemas import collectors_item_schema
from app.utils import loggers

logger = loggers.get_basic_logger(__name__)

api = Namespace(
    "collectors_items", description="Represents the collectors_items"
)

get_collectors_items_dto = api.schema_model("GetCollectorsItems", collectors_item_schema.get_collectors_items_schema)

@api.route("")
class CollectorsItems(Resource):
    @api.doc("Get collectors_items")
    @api.response(200, "Success", get_collectors_items_dto)
    def get(self):
        return collectors_item_service.get_collectors_items()
We have added the import of the schema. We’ve created an instance of a schema_model: get_collectors_items_dto = api.schema_model("GetCollectorsItems", collectors_item_schema.get_collectors_items_schema)
And then to use it added it to the response decorator parameters @api.response(200, "Success", get_collectors_items_dto). When we refresh the API UI we and open the GET /collectors_items information panel we should see the definition of the response object as defined in the schema.
Creating collectors_items
We start by creating the table definition in ./app/main/collectors_item/models/collectors_item_model.py:
from app.main import _db

class CollectorsItemModel(_db.Model):
    __tablename__ = "collectors_items"
    id = _db.Column(_db.Integer, primary_key=True, autoincrement=True)
    name = _db.Column(_db.String(255), unique=True, nullable=False)
    description = _db.Column(_db.String(255), unique=False, nullable=True)
    collectors_item_type = _db.Column(_db.String(50), unique=False, nullable=False)
    date_added = _db.Column(_db.DateTime, nullable=False)

    def serialize(self):
        description = self.description
        if not description:
            description = ""
        serialized = {
            "id": self.id,
            "name": self.name,
            "description": description,
            "type": self.collectors_item_type,
            "date_added": str(self.date_added)
        }

        return serialized
Here we import the SQLAlchemy instance _db to be able to define our table. The class derives from Model. We also define a table name with __tablename__, then we define the columns and I think those speak for themselves.
Finally we add a serialize() function which will help us serialize the object when we need to return it as a result to our endpoint.
To have the table created in the database we have to update manage.py:
...
from app.main import create_app, _db
...
app.register_blueprint(blueprint)
app.app_context().push()
_db.create_all()
...
Notice the extra import of _db and the line _db.create_all() which will create the database table(s).
Create, Read, Update, Delete Collectors Items from database
We are going to enable manipulation of database data using functions in ./app/main/collectors_item/services/collectors_item_service.py.
Read item(s) logic
To be able to read from the database, let’s update the get_collectors_items() function:
from datetime import datetime
import json
from app.main import _db
from app.main.collectors_item.models.collectors_item_model import CollectorsItemModel
from app.utils import loggers

logger = loggers.get_basic_logger(__name__)

def get_collectors_items():
    logger.debug(">>>>")

    try:
        collectors_item_results = _db.session.query(CollectorsItemModel).all()

        serialized_collectors_items = []
        for collectors_item_result in collectors_item_results:
            serialized_collectors_item = collectors_item_result.serialize()
            serialized_collectors_items.append(serialized_collectors_item)

        return serialized_collectors_items, 200
    except Exception as e:
        logger.exception(e)
        response_object = {
            "status": "failed",
            "message": "an error occurred"
        }
        return response_object, 500
This is the equivalent of what we had before for getting collectors_items but now getting them from a database and with some error handling and some extra imports.
We create a query using SQLAlchemy to get all the collectors_items: collectors_item_results = _db.session.query(CollectorsItemModel).all(). Then we loop through all of the results and serialize them into dictionaries so flask_restx can easily serialize them to JSON. Finally we return them and a nice status code: return serialized_collectors_items, 200.
The rest is basic error handling.
Create item logic
We need a way to add collectors_items. Using SQLAlchemy makes this very easy. Let us implement a new function for this in our collectors_item_service.py file:
def create_collectors_item(collectors_item_data):
    logger.debug(">>>> collectors_item_data: {}".format(json.dumps(collectors_item_data, indent=2)))
    try:
        new_collectors_item = CollectorsItemModel(
            name=collectors_item_data.get("name"),
            description=collectors_item_data.get("description"),
            collectors_item_type=collectors_item_data.get("collectors_item_type"),
            date_added=datetime.utcnow()
        )

        _db.session.add(new_collectors_item)
        _db.session.commit()

        serialized_collectors_item = new_collectors_item.serialize()

        return serialized_collectors_item, 201

    except Exception as e:
        logger.exception(e)
        _db.session.rollback()

        response_object = {
            "status": "failed",
            "message": "failed to create collectors_item"
        }
        return response_object, 500
Here we take a parameter collectors_item_data which is a dictionary / json structure received from the endpoint request. We use this data to create an instance of the CollectorsItemModel which gets added to the database using the _db.session.add() and _db.session.commit() calls. Finally if all goes well we return the serialized version of the database object (which should have an id assigned now) and a status code of 201 (Created).
To actually be able to create the collectors_items through the API we need to set up an endpoint.
We should add a schema for the creation of collectors_items so we can validate incoming requests that want to create a collectors_item add a new schema to ./app/main/collectors_item/schemas/collectors_item_schema.py:
create_collectors_item_schema = {
     "type": "object",
    "properties": {
        "name": {"type": "string", "minLength": 1},
        "description": {"type": "string"},
        "collectors_item_type": {"type": "string", "minLength": 1},
    },
    "required": ["name", "collectors_item_type"]
}
Here we are setting name and collectors_item_type to required, so that we can ensure a valid data entry into the database. We also require them to have at least 1 character of value.
In ./app/main/collectors_item/controller/collectors_item_controller.py add create_collectors_item_dto = api.schema_model("CreateCollectorsItem", collectors_item_schema.create_collectors_item_schema) under the get_collectors_item_dto = ... line and add a post function to the CollectorsItems class:
...
    @api.doc("Create a collectors_item")
    @api.expect(create_collectors_item_dto, validate=True)
    @api.response(201, "Success", get_collectors_item_dto)
    def post(self):
        collectors_item_data = request.get_json()
        return collectors_item_service.create_collectors_item(collectors_item_data=collectors_item_data)
Save and reloading the API UI we will have a new option POST for our /collectors_items endpoint.
Sending the correct data to this endpoint will result in the creation of a new entry in the database. Try it out!
Update item logic
We want our clients to be able to update collectors_item entries. Someone might have made a mistake in the name or description for example and would need a way to be able to correct their mistake.
Let us start with the schema. collectors_item_schema.py:
update_collectors_item_schema = {
     "type": "object",
    "properties": {
        "name": {"type": "string", "minLength": 1},
        "description": {"type": "string"},
        "collectors_item_type": {"type": "string", "minLength": 1},
    }
}
No required fields this time to allow partial updates. The id for the to be updated collectors_item will be retrieved from the endpoint address, so it’s not needed here.
The function in collectors_item_service.py:
def update_collectors_item(collectors_item_id, collectors_item_data):
    logger.debug(">>>> collectors_item_id {}, collectors_item_data: {}".format(collectors_item_id,json.dumps(collectors_item_data, indent=2)))
    try:
        collectors_item_to_update = _db.session.query(CollectorsItemModel).filter(CollectorsItemModel.id == collectors_item_id).first()

        if not collectors_item_to_update:
            error_msg = "collectors_item with id {} not found.".format(collectors_item_id)
            logger.error(error_msg)
            response_object = {
                "status": "failed",
                "message": error_msg
            }
            return response_object, 404

        # allow for partial update by checking each attribute one by one
        if collectors_item_data.get("name"):
            collectors_item_to_update.name = collectors_item_data.get("name")

        if collectors_item_data.get("description"):
            collectors_item_to_update.description = collectors_item_data.get("description")

        if collectors_item_data.get("collectors_item_type"):
            collectors_item_to_update.description = collectors_item_data.get("collectors_item_type")

        _db.session.commit()

        serialized_collectors_item = collectors_item_to_update.serialize()

        return serialized_collectors_item, 200

    except Exception as e:
        logger.exception(e)
        _db.session.rollback()

        response_object = {
            "status": "failed",
            "message": "failed to update collectors_item"
        }
        return response_object, 500
First we log the incoming data for debugging purposes. Then we try to retrieve the existing collectors_item entry by id. If it does not exist something is clearly wrong and we return a 404 resource not found status code.
If it is found we check every attribute to see if anything needs updating since they are all optional.
Finally we commit the changes and then serialize the database object so we can return it as response data.
Delete item logic
While we are at it let’s add the function for deleting collectors_items as well:
def delete_collectors_item_by_id(collectors_item_id):
    logger.debug(">>>> collectors_item_id {}".format(collectors_item_id))
    try:
        collectors_item_to_delete = _db.session.query(CollectorsItemModel).filter(CollectorsItemModel.id == collectors_item_id).first()

        if not collectors_item_to_delete:
            warning_msg = "collectors_item with id {} not found.".format(collectors_item_id)
            logger.warning(error_msg)
            response_object = {
                "status": "success",
                "message": warning_msg
            }
            return response_object, 200

        _db.session.delete(collectors_item_to_delete)
        _db.session.commit()

        response_object = {
            "status": "success",
            "message": "collectors_item with id {} successfully deleted".format(collectors_item_id)
        }

        return response_object, 200

    except Exception as e:
        logger.exception(e)
        _db.session.rollback()

        response_object = {
            "status": "failed",
            "message": "failed to delete collectors_item with id {}".format(collectors_item_id)
        }
        return response_object, 500
For the delete functionality we also check whether or not the collectors_item we are trying to delete exists. If it already doesn’t exist, that’s OK, the end goal was to remove this resource so we return a success code with a warning message.
If the resource does exist we simple delete it with:
 _db.session.delete(collectors_item_to_delete)
 _db.session.commit()
Note: we don’t need to define a schema for this operation as we only need the id for the collectors_item we are deleting and we will get that from the url.
All we need to do know is instancing an update collectors_item schema and creating a new route path to access collectors_item resources by id and the necessary endpoints in ./app/main/collectors_item/controllers/collectors_item_controller.py and call these functions:
First instance schema model from update_collectors_item_schema:
update_collectors_item_dto = api.schema_model("UpdateCollectorsItem", collectors_item_schema.update_collectors_item_schema)
Then we will create a new path so that we can use part of the endpoint path to represent the collectors_item id the client is allowed to manipulate:
@api.route("/<collectors_item_id>")
class CollectorsItemById(Resource):
    @api.doc("Update a collectors_item by id")
    @api.expect(update_collectors_item_dto, validate=True)
    @api.response(200, "Success", get_collectors_item_dto)
    def put(self, collectors_item_id):
        collectors_item_data = request.get_json()
        return collectors_item_service.update_collectors_item_by_id(collectors_item_id=collectors_item_id,collectors_item_data=collectors_item_data)

    @api.doc("Delete a collectors_item by id")
    @api.response(200, {"status": "success"})
    def delete(self, collectors_item_id):
        return collectors_item_service.delete_collectors_item_by_id(collectors_item_id=collectors_item_id)
Defining part of the route using <> indicates a variable we can pick up in our functions. The rest is similar to our other endpoints.
Now we have all the endpoints we need to do basic create, read, update, and delete operations on our collectors_item data. We are almost done building our dockerized flask RESTful API. The final part is the dockerization.
Dockerization
The last step to having an actual dockerized Flask RESTful API. Why do we want to dockerize? At some point we want to run this backend application in a production environment. One of the best ways to prepare for this is to create a docker image for the project. Docker images can easily be deployed anywhere and will run the same way
We require some additional files to set this up:
collectors_items-at-rest
...
+ setup.py
+ config.py
+ Dockerfile
+ .dockerignore
Starting with setup.py this file will install the app so that all the modules can be found by the code when the code is running.
The config.py file contains configuration for the gunicorn production server.
Open the file Dockerfile in the root, or create one if not already created earlier.
FROM python:3.6

RUN apt-get update || apt-get update && apt-get install -y \
    curl apt-utils apt-transport-https debconf-utils gcc build-essential  \
    && rm -rf /var/lib/apt/lists/*

# install necessary locales
RUN apt-get update && apt-get install -y locales \
    && echo "en_US.UTF-8 UTF-8" > /etc/locale.gen \
    && locale-gen

RUN pip install --upgrade pip
# Set the home directory to our app user's home.
ENV HOME=/home/app

# Create home directory for the new app user.
RUN mkdir -p $HOME

# Create an app user so our program doesn't run as root.
RUN groupadd -r appuser &&\
    useradd -r -g appuser -d $HOME -s /sbin/nologin -c "Docker image user" appuser

WORKDIR $HOME

# We copy just the requirements.txt first to leverage Docker cache
COPY ./requirements.txt ./requirements.txt
RUN pip install -r ./requirements.txt --ignore-installed

COPY . ./app
RUN pip install -e ./app

COPY ./config.py ./config.py
COPY ./manage.py ./manage.py

# Chown all the files to the app user.
RUN chown -R appuser:appuser $HOME

# Change to the app user.
USER appuser

CMD ["gunicorn", "--config", "config.py", "manage:app"]
I won’t go into detail on what’s contained in this docker file here, but in short: required tools and packages are being installed and the app files are being copied into the image and at the end a startupt command is configured so that gunicorn will run our app when the this image is started in a docker container.
For more information on what is happening in this docker file you can go [here]().
To build the docker image use the familiar command:
docker build -t collectors-items-at-rest-backend:latest .
Then, after the image building is complete, run the docker image:
docker build -p 8000:8000 collectors-items-at-rest-backend:latest
When the docker image is running we can use a browser to navigate to the API’s swagger interface at: http://localhost:8000.
Conclusion
We have now built a simple dockerized Flask RESTful API that allows a client to manage collectors items information in a SQLite database. The completed project can be found in the following github repository: https://github.com/tmsdev82/collectors-items-at-rest.
Next steps
Because we have a solid base project to build bigger applications on, we can start thinking about how to expand the scope of the dockerized Flask RESTful API.
However, before expanding the scope of the application we should start writing automated tests for our code. Writing tests and having them run automatically will ensure we can catch errors before they become big problems that are hard to fix, among other benefits.
We will learn how to write tests for our dockerized flask RESTful API in this follow up article.
Furthermore, our database set up is not what can be used for production. Because, the database we’re writing to is not persistent, we are writing to a database file in the container. That means that every time we restart the container the database will not exist and has to be recreated from scratch again.
We will address this in a later tutorial by connecting to an external database.