In this tutorial, we will learn how to create a Docker image for a Rust backend. We are going to write a small REST API program with the warp crate. Then we will write a Docker file to build a lean Docker image for it.
Creating a Docker image for our applications enables us to more easily distribute and deploy our applications, with the certainty they will run as designed.
Check out the full project on my GitHub: https://github.com/tmsdev82/rust-warp-docker-tutorial.
Prerequisites
To be able to follow along with the tutorial some of the following is useful:
- Rust installed
- Installation of Docker tools
- Knowledge of Rust programming
It helps to have some knowledge of Docker already, as well. Please read my article on some basics here: What is Docker and why is it used: quick primer.
I also have an article about writing a basic REST API that has more details than this article: How to build a REST API server with Rust and warp.
Setting up the project
As always we start by creating the Rust project using cargo: cargo new rust-warp-docker-tutorial.
Then let’s add the dependencies required for this project to Cargo.toml:
tokio = { version= "1", features = ["full"] }
warp = "0.3"
Short descriptions of the crates:
- tokio: A runtime for writing reliable, asynchronous, and slim applications with the Rust programming language.
- warp: A super-easy, composable, web server framework for warp speeds.
With just these crates we can set up a simple webserver.
Creating the Rust Warp backend
In this section, we will create the simplest backend server possible. A backend server with one valid path, the root path.
Open main.rs and replace the code with the following:
use warp::Filter;

#[tokio::main]
async fn main() {
    println!("Starting server...");
    let root = warp::path::end().map(|| "Welcome to my warp server!");

    let routes = root.with(warp::cors().allow_any_origin());

    warp::serve(routes).run(([0, 0, 0, 0], 5000)).await;
}
Here we bring warp::Filter into scope on line 1, so that we can use .map(). With this, we can create a simple root path mapping that returns a text when it receives an HTTP request.
We then use warp::cors() to configure the path to be accessible from any other domain origin.
Finally, we run the server with warp::serve(routes).run passing the routes configuration.
If we open a browser and navigate to localhost:5000 we should see our welcome message: Welcome to my warp server!
Create a Dockerfile for our Docker image
We will now create a Dockerfile for our project. A Dockerfile is a file describing the configuration of the environment required by our application.
First, we will create a simple, but unoptimized, Docker image. After that, we will create a better image that is smaller in size and makes better use of Docker’s caching mechanism.
Simple inefficient Docker image for the Rust backend
Let’s create our first version of the Dockerfile.
Dockerfile creation
Create a file called Dockerfile in the root of the project directory, and add the following lines of configuration:
FROM rust:1.57.0-alpine

RUN apk add --no-cache musl-dev
WORKDIR /opt/rust-warp-docker
COPY . ./
RUN cargo build --release

EXPOSE 5000
CMD ["/opt/rust-warp-docker/target/release/rust-warp-docker-tutorial"]
We use an alpine base image that has the latest version of rust as our base. This image uses Alpine Linux and is typically very small. On line 3 we install musl-dev which is required to compile certain parts of our project.
We then set the working directory to /opt/rust-warp-docker. This /opt is typically the directory where applications go on Linux systems.
Next, copy everything from our project over to the Docker image file system with the COPY . ./ command.
The project is built in the Docker image using the normal way: RUN cargo build --release.
The line EXPOSE 5000 doesn’t actually do anything, but is a way of documenting which port(s) the container listens to:
The
https://docs.docker.com/engine/reference/builder/#exposeEXPOSEinstruction does not actually publish the port. It functions as a type of documentation between the person who builds the image and the person who runs the container, about which ports are intended to be published.
Finally, we configure the command that the Docker container executes when the container starts. In this case, the command to execute is our application’s executable.
Building the Docker image
We can now build the image using the following command: docker build -t rust-warp-docker:latest . The name used here can be anything really, the :latest part is a way of indicating that this is supposed to be the newest version and will be used by default when starting a container with this image. By default Dockerfile is used to build the image if no other file name is passed as a parameter.
Building the image can take a very long time since it needs to build all the dependencies as well.
Running the Docker container for the Rust backend
After Docker is finished building the image we can run it using the docker run -p 3000:5000 rust-warp-docker command. This -p 3000:5000 part means we direct the 3000 port on our local machine to the container’s 5000 port. We can make the 3000 part any (available) number. It is 3000 right now just to illustrate it can be different from what we configured in our code internally. This will be important in a later section in this tutorial where we look at running multiple instances of our backend app.
Once the container is up and running we can navigate to localhost:3000 to see that the server is responding.
Look at the running containers using docker ps

The name under NAMES is chosen at random by Docker. To stop the docker container from running use the docker stop <container name> command, in this case: docker stop awesome_ptolemy.
Making an efficient Docker image for the Rust Backend
The image we created in the previous section has many flaws. In this section, we will fix those flaws and make a better image. Let’s go through it step by step.
Use .dockerignore
First of all, we are probably copying too much with our COPY . ./ command. To filter out unnecessary files we will create a .dockerignore file. This file is similar to the .gitignore for git. Docker excludes any folder or file mentioned in .dockerignore when building the Docker image.
Let’s create a file called .dockerignore in the root directory of our project:
target
.gitignore
Dockerfile
Mainly, we want to exclude the target directory containing our local build files.
Inefficient Dockerfile build steps
The current structure of the Dockerfile makes the Docker build process very inefficient. For example, if we change a line in our main.rs source file and then build the Docker image again, almost every step needs to be redone.
Every line is a step in the build process and is a layer in the Docker file system. Docker uses this as a way of caching the build steps. Docker skips these steps automatically if we did not change anything in the context of these steps.
However, if we change main.rs this means the context for COPY . ./ has changed. This means that Docker will redo that line and every line after it. This is terrible because that means that Docker will also redo the line to compile the dependencies. Resulting in a big loss of time every time we change code and rebuild the Docker image.
Let’s change line 6 in main.rs to let root = warp::path::end().map(|| "Welcome to my dockerized new warp server!"); and then build the Docker image again with docker build -t rust-warp-docker:latest . to see that the dependencies are rebuilt as well as the main code.
How to improve Dockfile build step efficiency
To make the build process more efficient we will separate building the dependencies and the application code. We are going to make it so that Docker builds the dependencies first. Because they will typically not change very frequently.
Let’s update the Dockerfile with the following:
FROM rust:1.57.0-alpine

RUN apk add --no-cache musl-dev
WORKDIR /opt
RUN USER=root cargo new --bin rust-warp-docker
WORKDIR /opt/rust-warp-docker
COPY ./Cargo.lock ./Cargo.lock
COPY ./Cargo.toml ./Cargo.toml
RUN cargo build --release
RUN rm ./src/*.rs
RUN rm ./target/release/deps/rust_warp_docker*

ADD ./src ./src
RUN cargo build --release

EXPOSE 5000
CMD ["/opt/rust-warp-docker/target/release/rust-warp-docker-tutorial"]
We have added a lot of extra steps, starting from line 5. We will go through each line and talk about what they do and why the lines were changed.
The main trick here is to create a new Rust project during the Docker image build using cargo new. Then we set the working directory to the new project’s directory. Next, we copy over the Cargo.lock and Cargo.toml for the dependencies on lines 7 and 8. We are then able to build the dependencies on line 9.
Then we remove the Rust source files from the src directory on line 10 and the built executable also is removed on line 11.
Finally, we add our project’s source files on line 13 and then build the application code. We have left the lines after that unchanged.
Demonstrating the Docker image build caching
Now that we have the build for the dependencies and the application separated, we can demonstrate the power of Docker’s caching system.
First, let’s build the new version of the Docker image with our new Dockerfile: docker build -t rust-warp-docker:latest . then we will make a change to main.rs and build again.
Change line 6 in main.rs to: let root = warp::path::end().map(|| "Welcome to my efficiently dockerized new warp server!");. When we build the image now, we should see that all steps before ADD ./src ./src were cached:
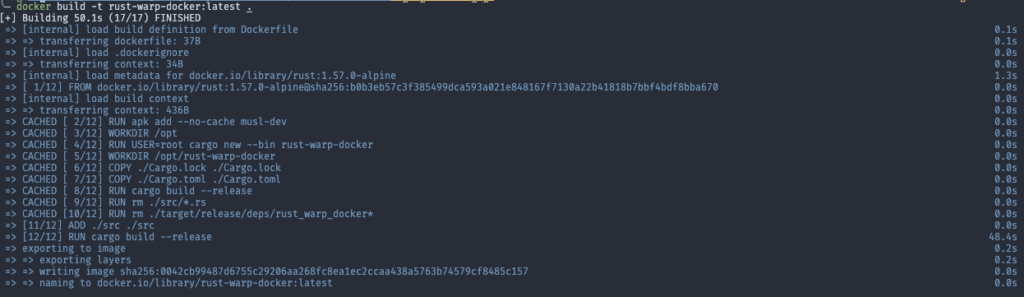
So, the Docker build will only compile the source files again. This takes much less time than before.
Making a smaller Docker image for the Rust Backend
We now have an efficient build for our Docker image but even though we are using Alpine Linux, the image is actually quite big. We can look at the size by listing the Docker images on our system: docker images:
REPOSITORY                                              TAG             IMAGE ID       CREATED          SIZE
rust-warp-docker                                        latest          0042cb99487d   6 minutes ago    1.31GB
The image is a whopping 1.31 GB in size. Why is that? Well, Rust’s libraries, various build tools, and dependencies take up a lot of space. However, the resulting executable is tiny by comparison, only 2MB.
What we want to do is to first build our code in an image that has all the build tools and dependencies available, and then copy the resulting executable over to an image that is much leaner and lighter. With Docker this is easy, it is all done in the same Dockerfile.
Using multiple images
Let’s update the Dockerfile once again to facilitate this process. The changed and added lines are marked:
FROM rust:1.57.0-alpine as builder

RUN apk add --no-cache musl-dev
WORKDIR /opt
RUN USER=root cargo new --bin rust-warp-docker
WORKDIR /opt/rust-warp-docker
COPY ./Cargo.lock ./Cargo.lock
COPY ./Cargo.toml ./Cargo.toml
RUN cargo build --release
RUN rm ./src/*.rs
RUN rm ./target/release/deps/rust_warp_docker*

ADD ./src ./src
RUN cargo build --release

FROM scratch
WORKDIR /opt/rust-warp-docker
COPY --from=builder /opt/rust-warp-docker/target/release/rust-warp-docker-tutorial .

EXPOSE 5000
CMD ["/opt/rust-warp-docker/rust-warp-docker-tutorial"]
On the first line, we add a label builder to the image we are building as build. This will let us refer to this image later on in the build process.
We have left the image building as normal. However, on line 16 we start a new image using scratch as a base. The scratch image is basically an empty image without anything in it. Using this will result in a tiny Docker image. We will still be able to run our Rust backend, though, since it doesn’t need anything else. However, for more complex code, we should use a different image as a base, for example alpine.
Next, we use the copy command on line 18, to copy the compiled executable from the image we marked as builder to the /opt/rust-warp-docker directory. That is all we need for this application.
Finally, we updated the command to start the server with the new path to the executable.
Building the smaller Docker image
Now let’s look at how much the size of the Docker image for our Rust backend has been reduced thanks to this new configuration.
First, let’s change the welcome text for our server again: warp::path::end().map(|| "Welcome to my tiny efficiently dockerized new warp server!");
Then, let’s build the image: docker build rust-warp-docker:latest ., and finally, let’s execute the docker images command to look at the image size:
REPOSITORY                       TAG             IMAGE ID       CREATED         SIZE
rust-warp-docker                 latest          7634cfd69284   7 seconds ago   6.56MB
Our new Docker image is only 6.56MB! That is really tiny.
Extra examples
We have learned the basics of making an efficient and lean Dockerfile. In this section, we will look at some other situations and how to deal with them.
Dealing with data files
What if we have an application that reads data from a file or reads configuration from a file. How and when would we include these files?
Let’s add a new directory to the root directory of our project called data and add a file to it data.txt. The text file should contain a single line message: Welcome to my tiny efficiently dockerized new warp server using a data file!
Then let’s update the main.rs file to read the file and use the contents as the response message for our root path:
use std::fs;
use warp::Filter;

#[tokio::main]
async fn main() {
    println!("Starting server...");
    let text_msg = fs::read_to_string("data/data.txt").expect("could not read file");
    let root = warp::path::end().map(move || text_msg.clone());

    let routes = root.with(warp::cors().allow_any_origin());

    warp::serve(routes).run(([0, 0, 0, 0], 5000)).await;
}
Here we simply read the text file to a string on line 7, then move it into the closure and clone it.
Finally, we have to update the Docker file, so that Docker copies this file to the appropriate directory. If we consider Docker’s caching mechanism, we should put the file copy at the latest possible moment. Because copying the files is quick, but the code build actions are not. If we were to put the copy command before the cargo build --release command, Docker will rerun them every time the data changes.
Therefore, let’s update Dockerfile to look like this:
FROM rust:1.57.0-alpine as builder

RUN apk add --no-cache musl-dev
WORKDIR /opt
RUN USER=root cargo new --bin rust-warp-docker
WORKDIR /opt/rust-warp-docker
COPY ./Cargo.lock ./Cargo.lock
COPY ./Cargo.toml ./Cargo.toml
RUN cargo build --release
RUN rm ./src/*.rs
RUN rm ./target/release/deps/rust_warp_docker*

ADD ./src ./src
RUN cargo build --release

FROM scratch
WORKDIR /opt/rust-warp-docker
COPY --from=builder /opt/rust-warp-docker/target/release/rust-warp-docker-tutorial .
COPY ./data ./data

EXPOSE 5000
CMD ["/opt/rust-warp-docker/rust-warp-docker-tutorial"]
Great! Now we can change the welcome message without having to rebuild the source code for our application.
Environment variables and multiple Docker container instances
In this last section, we will look at the power of using Docker and containers in general. We are going to take a value from an environment variable and show it in our message. Then we are going to show how easy it is to start multiple instances of our application.
First, we write the code for reading an environment variable using std::env and the env::var() function:
use std::env;
use std::fs;
use warp::Filter;

#[tokio::main]
async fn main() {
    println!("Starting server...");
    let instance_name = env::var("INSTANCE_NAME").expect("Error reading environment variable.");
    let text_msg = fs::read_to_string("data/data.txt").expect("could not read file");
    let text_msg = format!("[{}] {}", instance_name, text_msg);
    let root = warp::path::end().map(move || text_msg.clone());

    let routes = root.with(warp::cors().allow_any_origin());

    warp::serve(routes).run(([0, 0, 0, 0], 5000)).await;
}
Here we read the INSTANCE_NAME environment variable to a String variable on line 8. Next, we use the value to create a formatted string on line 10 to combine it with the welcome message read from the data.txt file.
If we run the application with the following command in the terminal: INSTANCE_NAME=my_instance cargo run --release, we should see a new message in our web browser.
We can run the docker container and set an environment variable on it using the -e parameter. Let’s also use -d to run the container in the background: docker run -p 3000:5000 -e INSTANCE_NAME=docker1 -d rust-warp-docker.
Let’s run another instance of our application from the same terminal using the following command: docker run -p 3001:5000 -e INSTANCE_NAME=docker2 -d rust-warp-docker. Note: make sure that the port number is different from the first instance.
Let’s look at the running instances with docker ps:

If open the browser on localhost:3001 now we should see a different instance name than on localhost:3000.
This is the power of Docker and containerization. We can easily run multiple instances of our containerized application and configure each instance to do something different from the other instances.
Conclusion
Completing this tutorial we have learned how to design a Docker image build file for our Rust backend for efficiency and compactness. We made sure building the image doesn’t take unnecessarily long. We did this by layering the steps in a certain way and splitting out build steps for the code we make sure that building. On top of that, we learned the usefulness of building a Docker image in stages, using different base images for each stage.
The full project can be found on my GitHub: https://github.com/tmsdev82/rust-warp-docker-tutorial.
Please follow me on Twitter for updates on new Rust programming and Docker related articles:
Follow @tmdev82